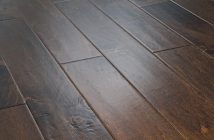
First and foremost you must ensure that the type of flooring you have purchased is suitable for a floating installation, if the floor is a solid wood type then it is not suitable for floating, this is because solid wood is prone to a large amount of expansion, these types of floor need to be directly bonded to the sub floor by either nailing or gluing down.
The only types of wood floors that can be floated are those that are engineered, this flooring is made by bonding a veneer of wood, often called a ‘stave’ to multi layer ply wood. This creates a multi directional structure, which makes it very stable, and therefore suitable for floating installation.
Now you have ensured that your flooring is suitable for this type of installation, you must ensure that your subfloor is suitable and ready to accept your flooring.
With a floating floor your sub floor can be timber, concrete, or screed or a mixture of all three, you have to ensure that your sub floor is level and flat i.e. no deviations greater than plus or minus 2mm over 1.5m.
If the sub floor does need levelling, then this can be done using a variety of methods. If you have floor boards which are cupped and crowned i.e convexed or concaved, then you can ‘ply over’ these using 3mm ply or hardboard. The ply or hardboard should be stapled down using 18 gauge 18mm staples or tacked down using annular ring shank nails no longer than 20mm. The depth of these fixings is very important as if they too long then there is a chance you may hit a water/gas pipe, as these are sometimes notched into the joists underneath the floor boards.
If they are very uneven you could use a thicker sheet of ply anywhere between 9 and 18mm, obviously the thicker sheet you use then the higher finished floor level will be.
If the floor is still un-level after installing the ply then level this out using a latex levelling compound, this must be a two part compound and suitable for using over timber, we normally use Adtitex yellow bag and black bottle. You must always prime the timber which is to be latexed with Bal R1131 or Arditex acrylic primer.
When you have a level surface you must now undercut all of the door frames, nule posts (nule posts should only be undercut by 10mm anymore will make the post unstable) and architraves. It is very important do to this as it enables you to archive a seamless finish; it also allows an expansion area for the timber. We do this using an undercut saw, which is basically an upside down circular saw with a height adjustable sole plate, this allows the correct height equal to that of the finished floor level to be undercut and removed. If you do not have a undercut saw then the best alternative would be to use a small piece of flooring on top a piece of underlay, this will give you the correct height you can now undercut this using a small handsaw resting on top of the flooring and underlay. Make sure you only undercut as far as the flooring is going to go i.e. if your floor finishes at a threshold to a kitchen for example, only undercut up to the end of the door stops. Remember you must always leave 25-30mm gap between an existing floor i.e. tiles and your new floor to allow a graduating door bar to be fitted.
You may find that when you have undercut using a hand saw or undercut saw, that there is still a piece of wood /frame that you cannot cut through. Really the only way to get this last piece is to use a tool called a ‘Fein Multi Master’, this tool has a reciprocating narrow blade which will enable you to get in the tightest of spaces to remove the last piece of timber. Obviously if you are only going to be fitting your own floor and not doing this as a job, then the investment of £180/$220 for one of these tools would probably not be worth it. In this case you could use a very sharp chisel to remove the last piece of wood/frame by gently chiselling away at it bit by bit, this does work but takes care and time. When you have under-cut fully use a narrow chisel (narrower than the cut you have made) to ‘knock out’ the pieces of frame/wood, make sure you have removed all that you can, the more you remove now the easier it will be to install the floor later.
You are now ready to underlay your floor, simply roll out the underlay across the floor making sure it goes right up to the edges but does not’ flap up’ the edges. You do not need to put underlay underneath the frames that you have cut out or under any nule posts, you will find that this will get in the way when trying to install the floor.
On a screed or concrete floor your underlay will need a DPM (damp proof membrane), most modern underlay’s such as Treadaire Boardwalk or Timbermate Excel have a built in damp proof membrane, we would recommend that you use one of these, any breaks or joins should be fully sealed with vapour tape or Duck tape.
If you have purchased an underlay without a built in underlay, then you will need to lay a separate DPM, this should be a 1000 gauge polythene with any breaks fully sealed with vapour taped/Duck tape.
On a timber suspended floor you do not need a DPM nor do you have to fully tape the underlay together, it just be taped at approx 300mm intervals, just enough to hold it together whilst the floor is fitted.
Now you have installed your underlay you are now ready to start fitting your floor. First indentify the longest straightest wall, your floor should always run with the longest wall. If you have radiators in the room then you try to start from these as it easier to cut around radiator pipes now than it is on the last line.
Lay the first line of boards down with the groove in the board facing the wall, when you get to the end of the line you will need to cut the final board in, this can be easily measured as follows; If you have a tongue on the board that is laid on the floor, you need to place the final board with its end groove against the wall you are going to finish on. Leave a 10mm gap between the groove end and the wall; now mark of what is to be cut off by marking a line on this board in line with the end of the board that is on the floor. I know it sounds confusing but it really isn’t too difficult, if you are unsure use a tape measure to check your measurement and then use the off cut to start the next row.
When you have laid two complete rows, space the floor from the wall allowing approx 10mm expansion gap, use plastic spacers (available from most DIY stores). There may places where this is greater or lesser than 10mm, don’t worry too much about this, as long as there is no point which is smaller than 5mm or greater than the thickness of the skirting or beading which you are going to use to cover the expansion gap. If you are covering a very wide room then you do need to be quite strict with the expansion gap.
Carry on laying the floor keeping the expansion gap all around the room, stagger all the joins by at least 300mm on every row, remember to be vigilant with the boards that you install, any particularly dark or oddly grained boards should be discarded or used in inconspicuous place such as under stairs or as the last board at the edge of the room.
Remember to leave approx 35mm between the edge of the new wood floor and any existing floor to allow for a door bar. The new wood floor should finish just inside the door stops (approx 5mm). This is so that the door bar fits underneath the door and you cannot see the flooring from the other rooms. When all the doors are closed surrounding the floor you have just fitted, you should not be able to see any of the other floors coming from the other rooms.
You should now have your entire floor fitted, the only thing that remains to do is to remove your installation wedges (ideally these should be left in place for 12 hours so that the glue can set), once removed you either fit your skirtings or beading.


