I will start off saying that if your first step is to crack open a can of paint, call a professional because it’s not going to go well. For everyone else, please read the entire page carefully before you begin.
TOOLS NECESSARY:
All tools and materials can be found at your local Sherwin-Williams Retailer
- Paint
- Drywall Primer if needed
- Paint Thinner if needed
- Spray Can Primer
- Quality 2-4 inch paint brush
- Screwdrivers: Phillips and Flat
- 5 in 1
- 5 or 6 inch drywall knife
- Utility Knife
- 5 or 6 foot step ladder
- 100-120 Grit Drywall Sand Paper
- Pole Sander optional
- 80 Grit Sand Paper optional
- Furniture Sliders
- Caulk Gun/ Painters Caulk
- Drop Cloths or Heavy Plastic
- Power Hand Drill
- Rolled Plastic or General Purpose Making Paper
- 9 inch Roller handle
- inch Roller Cover
- Rolling Pan or 5 Gallon bucket and grid
- Several Rags
- 2×4 Foot Rolling Pole (A broomstick will work in a pinch)
- Joint Compound (Recommendation: Sheetrock lightweight setting-type joint compound 20 minute)
- 1-1/2 inch Scotch Blue Painters Tape #2090
- 1-1/2 inch Scotch Masking Tape #2020
PREPARATION:
Removing Fixtures- Remove as much furniture as you possibly can from the room to be painted using furniture sliders. Remove all switch plates with a flat head screw driver. Remove all window treatments curtains, and blinds that may interfere with the painting process. Cover the remaining fixtures by taping plastic or paper over them. You do NOT need to remove brackets if you have sufficient access to brush around.
TIP: In my experience, most curtain rod brackets and other small brackets are usually installed only into the drywall or plaster. Removing the screws generally strips out the hole. Unless you intend to fill the holes and reinstall the brackets, just wrap a piece of tape around the bracket.
Taping- Tape the flooring at the wall. If the floor is wood, laminate, vinyl, or similar be sure the tape is right up against the wall, baseboard, or shoe molding depending on the items you are painting. Run your finger down the tape pressing hard on the painted side to seal the tape to the floor. At corners, rip the tap so that there is still 4 inches to spare. Use a utility knife to cut excess off. If carpet flooring, overlap the tape about one quarter inch onto the baseboard/wall, tucking it down between the carpet and the baseboard/wall. This will prevent paint from seeping on the carpet. Wrap a piece of tape around all brackets still remaining. If you’re painting window sashes, run tape along the outer edge of window panes. Windows must be completely dry of condensation or paint will seep under the tape. Use a utility knife to cut the tape at the corners. Press down firmly on all tape to prevent paint from seeping underneath. I recommend using scotch blue painters tape (#2090) for adhering to wood, window panes or drywall surfaces. I recommend using scotch masking tape (#2020) for taping carpet because of its flexibility. Either one you choose, DO NOT use old tape or leave tape adhered for more than 24-48 hours unless you plan on using a torch to remove it. I do not recommend the latter.
Covering Floor and Furniture- Before proceeding, lay down heavy drop cloths or heavy plastic on all flooring so that it’s completely covered. Cover all furniture completely with plastic or light drop cloths.
Repairing nail pops, holes, and cracks- Use the pointed end of 5 in 1 to dig out small cracks. For nail pops, use a 5 in 1 to pull free any loose drywall pieces or joint compound. Remove the nail/screw causing the nail pop. Using a power drill, fasten a new screw two inches or so next to the old hole making sure you hit a joist or stud. Be sure to countersink the screw. Using a six inch mud knife and joint compound, fill all holes, cracks, and nail pops. Scrape all access material away to prevent an enormous amount of sanding. For minor cracks in corners where it may be difficult to get a drywall knife, finger in just enough joint compound to fill the crack. Be sure it’s smooth as it may be difficult to sand. After all joint compound is completely dry, hand sand until smooth to the touch. Bigger holes and crack may require a second coat of joint compound. The general rule is “If you can feel the imperfection by running your hand over it, you will see it upon completion. If done properly with the right tools and joint compound, a couple strokes with a piece of sand paper will do the trick. Use caulk gun to fill any cracks or gaps in woodwork and wipe smooth.
Pole sand/Hand sand- Using 120 grit drywall sand paper, Pole sand or hand sand all walls and ceilings to remove any imperfections in the surfaces. Hand sand all woodwork. Use 80 grit sand paper on stubborn areas.
Priming- Determine whether you will need to put a primer coat on the entire room or if you simply need to spot prime. There are two conditions in which I would highly recommend completely priming the entire room. A.If the room has been smoked in for a considerable amount of time, I recommend using a good oil base primer such as “Kilz”. Wear a respirator when applying oil base paint. Open all windows for proper ventilation. B.If you are painting after removing wallpaper, a good latex primer will be sufficient. If neither of these is the case, use a spray can primer like “Pro-Block” or “Kilz” to seal any stains and/or drywall compound patches. Let dry thoroughly. Spray primer usually dries within a few minutes depending on humidity. I recommend buying a cheap brush for oil-based paint that you can toss in the garbage when finished. In my experience, the price of paint thinner and the clean-up involved isn’t worth the extra effort.
Professional painters differ on which order to paint woodwork. I paint all the woodwork before the walls except for baseboards. I highly recommend you to do the same. It’s much easier to tape the edge of the window/door casing or freehand brush up to that edge rather than trying to paint that edge after the walls are complete. This saves a lot of time and generally better results.
WALLS & CEILINGS – If you Do Not have the confidence to brush freehand my recommendation is to begin with the walls. After painting walls you MUST let the paint dry completely. For best results, let dry for 24 hours. Run tape at the top of the wall horizontally right up to the ceiling pressing firmly on the top edge of the tape. Be sure to run it tight in the corners as you move around the room. You are now ready to begin painting ceilings. Let paint dry completely before removing the tape. In my experience, this will get you the straightest ceiling line possible using tape. Remove tape by pulling down rather than out to avoid pulling off the wall paint.
PAINTING
Preparing Roller Cover- Start by wrapping your roller cover completely with tape to remove loose lint. Unwrap and set roller cover in your 5 gallon bucket or paint tray. (Remove any debris in bucket/paint tray beforehand). Open one gallon of paint and pour directly on the roller cover leaving one quart in the gallon in which you will use for brushwork. Be sure to completely soak the roller cover. Put a lid on your bucket and let soak while you do the brush (cut) work. Do Not overfill rolling pan. This process helps prevent the roller from matting up.
Proper Brush Techniques- Hold your brush similar to how you would hold a pencil. This gives you the most control over the brush. Dip your brush into the paint 1 inch or so. Slap the brush on the insides of the paint can a couple times to keep the paint on your brush. Do NOT scrape the brush on the rim of the paint can. Apply paint generously to surface using 6-8 inch strokes. Stroke the brush from the leading paint edge back into your paint on each final stroke before dipping brush again. This will give you a smooth uniform coat of paint. When painting trim, after applying paint to a complete horizontal/vertical piece of casing, apply one final stroke from end to end for best results.
Attach the Roller Cover and Pole-Prop the soaked roller cover up on end while you slide the roller cover onto the roller handle a couple inches until snug. Smack the arm of the roller handle into the roller cover until it’s on completely. Now attach the rolling pole to the handle.
Applying Paint to the Roller Cover –
- From Rolling Pan- Roll the handle down the ramp into the paint several times picking it up each time as not to roll back out of the paint. Then roll the roller handle on ramp to remove excess paint.
- 5 Gallon Bucket- Place the 5 gallon bucket grid into the bucket hooking it on the rim. Roll the handle down the grid until the roller cover touches the paint several times. Do not dunk the whole roller into the paint. Then roll the handle down the grid several times to remove access paint.
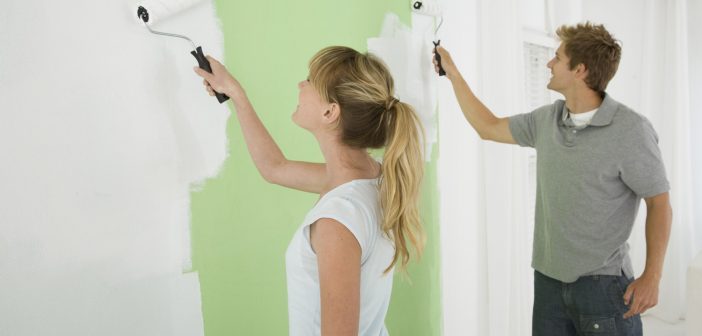
Rolling Walls – Place roller at the top of the wall, one foot from corner. Roll away from the corner and then back into the corner in “W” shaped patterns never taking roller off of the surface. You will be painting a width of approximately 2 feet at a time depending on the height of the ceiling and the paint you’re using. Repeat as necessary. When rolling smaller areas, such as above doors and windows, roll access paint off on larger portion of wall beforehand. Do not scrape the roller on the adjacent wall. Stop 1 inch from the corner. Apply only enough pressure to keep the roller on the wall. Do not push down hard on the roller. Do not try to squeeze out the last drop of paint. Keep the roller wet. Not following these instructions will cause your roller cover to matt and will in turn cause lines from the edges of the roller cover. If the roller handle arm accumulates excessive paint, wipe clean with a rag. This is where most drips fall from the roller.
Rolling Ceilings – Use the same rolling instructions as the wall, you will paint half of the ceiling at a time. Always roll horizontal to the main source of light. This provides the best outcome for hiding any flashing.
CLEANING UP
Clean up all tools, brushes, and rollers used with latex paint in warm soapy water. Hot water will ruin quality brushes. If cleaned properly, a quality brush will last for years. Use paint thinner to clean up any tools used with oil-based paint.


